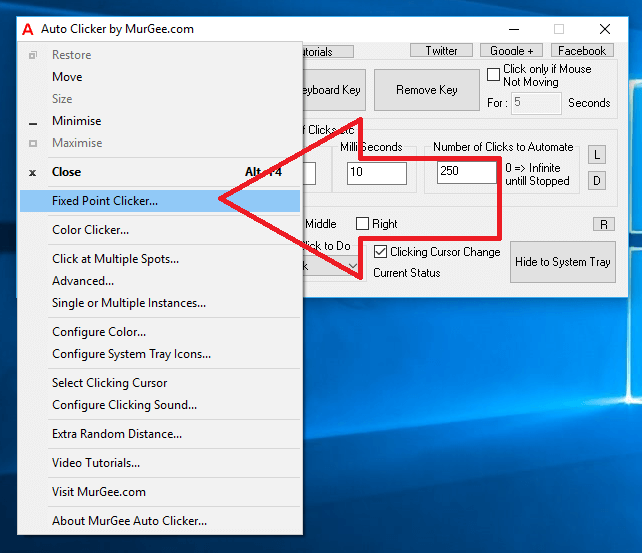
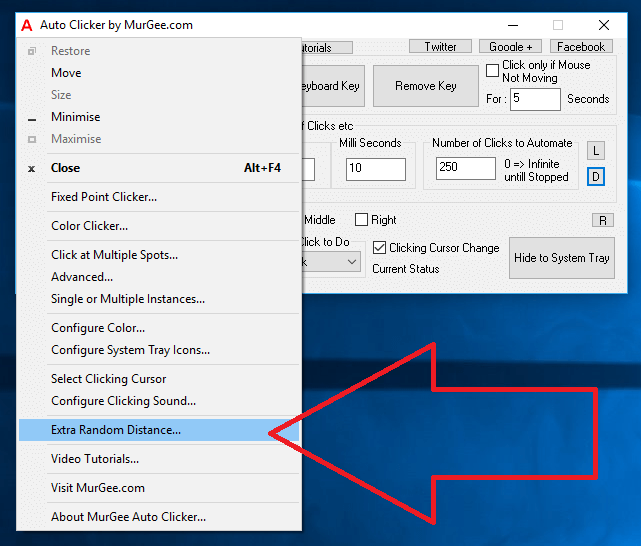
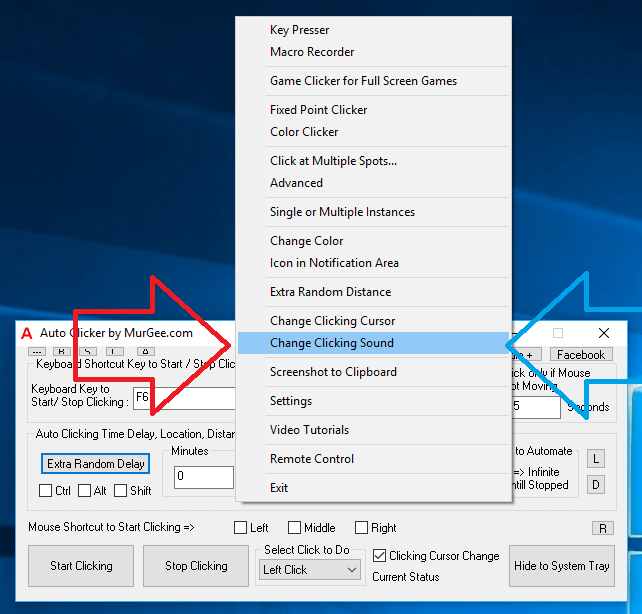
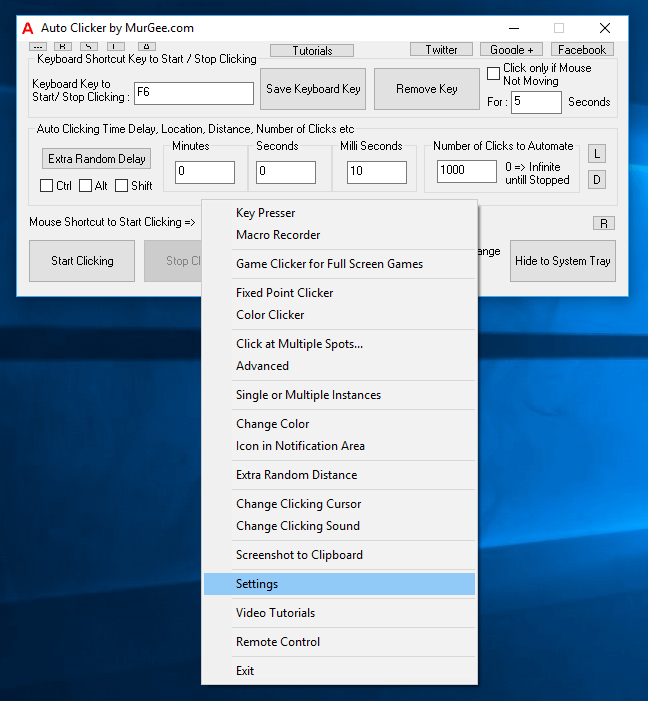
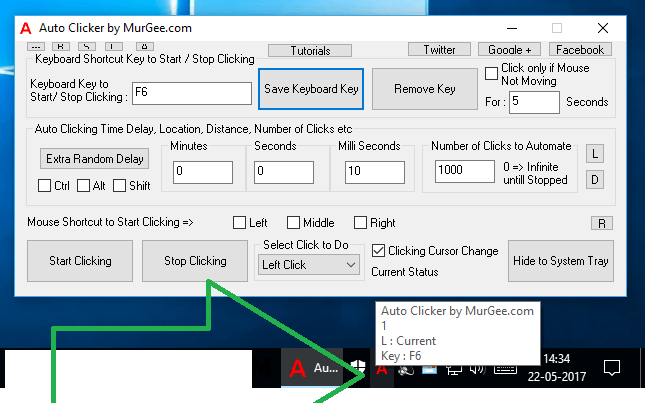
Full screen Games run on a variety of technology and the Automatic Mouse Clicking method described here works in all types of Full Screen Games, Multiplayer Games, Direct X Games and everywhere else. The inbuilt Game Clicker of Auto Clicker allows you easy and quick way to Auto Click in all types of Games and Windows Applications. To get started, right click on the software to view a menu containing the menu option Game Clicker for Full Screen Games as displayed in the screenshot below.
Game Clicker for Full Screen Games Menu on Right Click of Auto Clicker
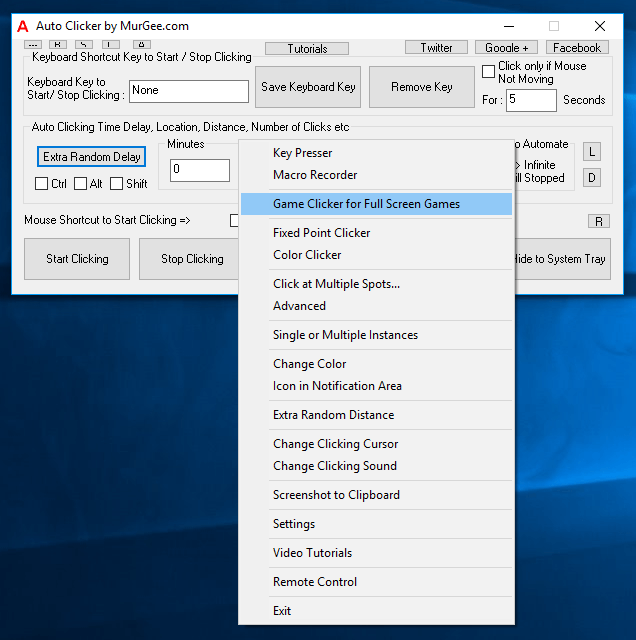
The Game Clicker requires one time installation and does requires admin rights to your windows computer. The Installation of Game Clicker is a one time process and is different from standard software installation on a Windows Computer. Yes the complete installation procedure is really easy to follow and video tutorial is also provided for the same. To download Game Clicker and the appropriate helper application, click on Yes for the Game Clicker Download Confirmation Screen as displayed in the screenshot below. Note that you can also see Game Clicker which will be accessible only after successful installation of the extra files required by Game Clicker.
Game Clicker Download Confirmation
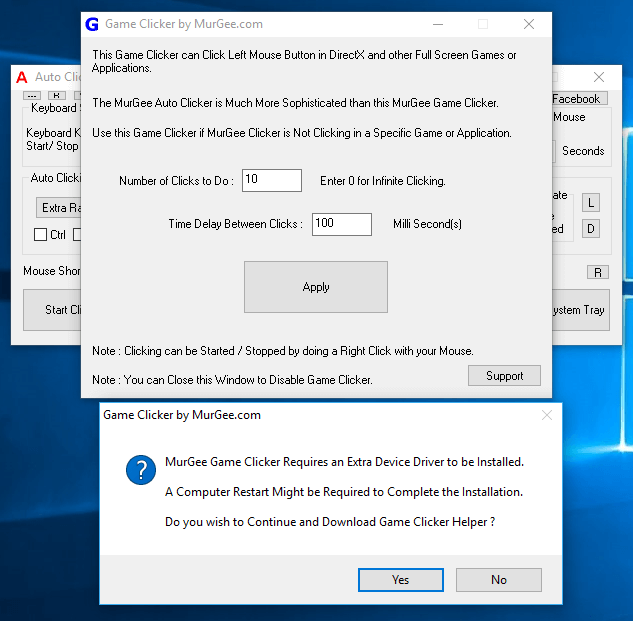
Once you click on the confirmation screen, a Software will be downloaded and the Application will become non-responsive for a while depending on the speed of your internet connection. Once the Game Clicker download is complete, you will be presented a screen outlining the steps required to be completed in order to install the Game Clicker files. The given below screenshot displays the Game Clicker Installer Helper Application and provides video tutorial about the whole procedure. Do make sure to review all the steps and ensure you do understand all the steps required and only then proceed to Step 1 and complete remaining steps.
Game Clicker Installation Helper on Windows 10
The Game Clicker needs a PS/2 or USB Mouse attached and working on your Windows Computer. The Automated Mouse Clicks sent by Game Clicker to Game or any other Windows Application are sent on almost hardware level. The above Screenshot was captured on a Windows 10 computer, however the Game Clicker Installation Helper detects Windows 10 Computer as Windows 8.1 Computer, but it is fine to proceed ahead. This Game Clicker can be installed on a Windows 7, Windows 8, Windows 8.1 or on a Windows Computer.
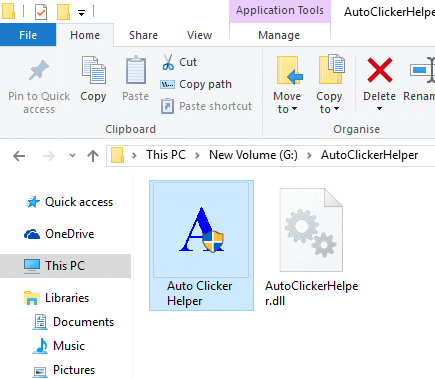
Do Review whether you have a PS/2 or HID Compliant USB Mouse, download the required files by clicking the Download button on the Game Clicker Installation helper and carefully install the new files with the help of Device Manager. Once you have completed all the steps, you should be able to see your Mouse in Device Manager updated with Game Clicker name. In most cases Windows Restart is not required, however just to be safe, ensure that you can indeed restart your Windows Computer if at all required.
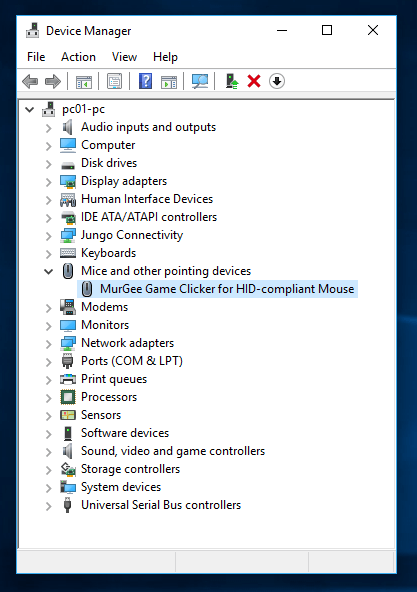
Game Clicker Installation Confirmation in Windows Device Manager
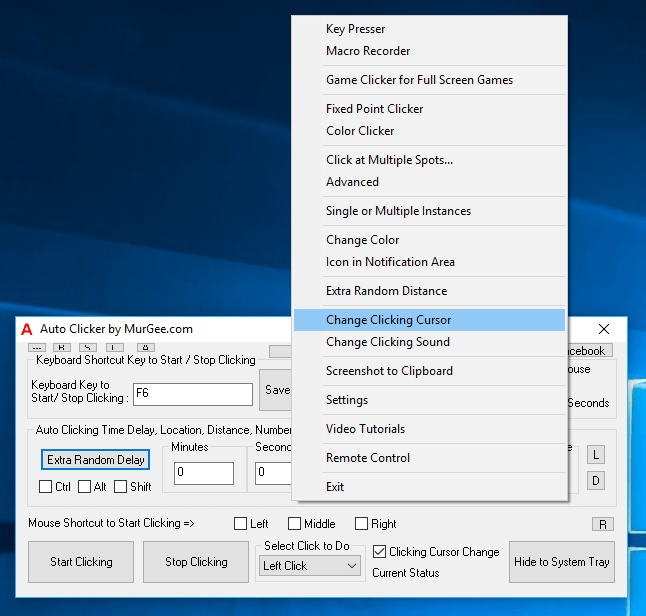
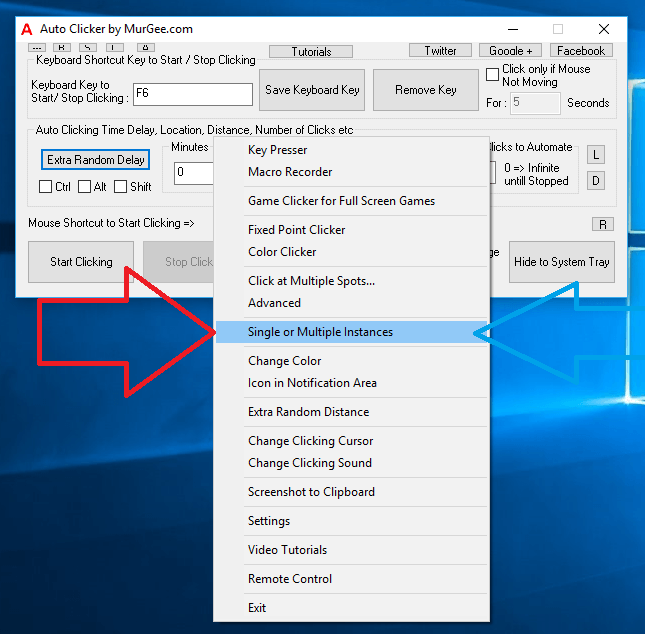
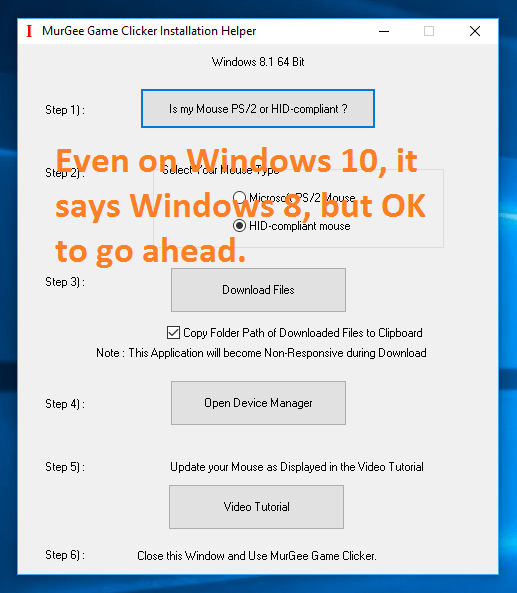
Upon successful installation of the Game Clicker files, you should be able to use the Game Clicker. The given below Screenshot displays the Game Clicker Screen with default configuration settings. Note that upon Clicking on the Apply button, Game Clicker displays usage instructions which in the given below screenshot says that whenever you do a manual Right Click, the Game Clicker will Auto Click with Left Mouse Button 10 times. Yes you can change Number of Automated Clicks to do and Time Delay between consecutive clicks.
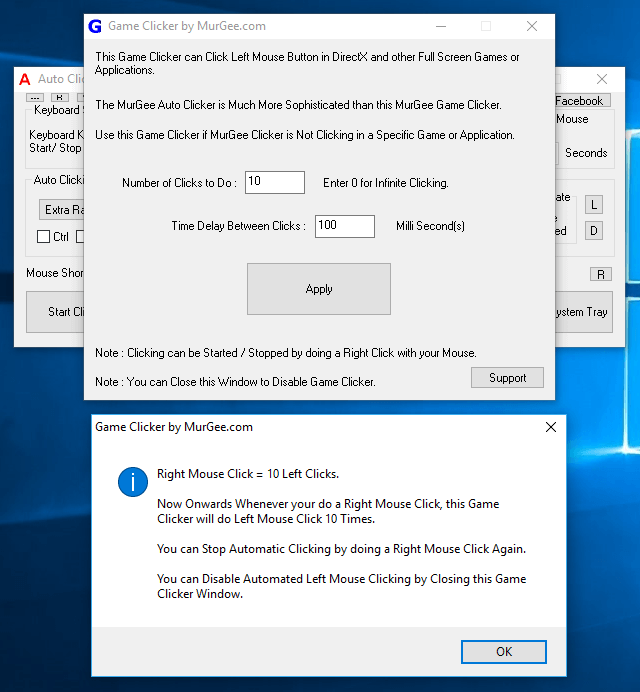
Game Clicker Usage Instructions
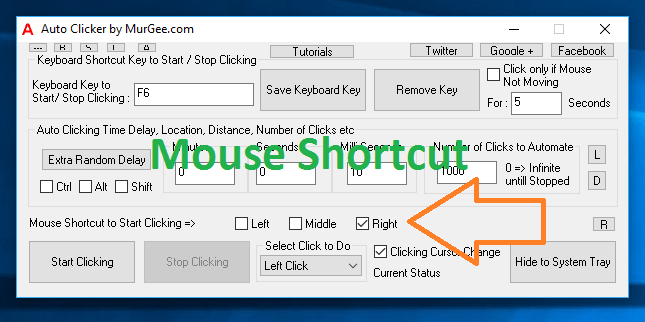
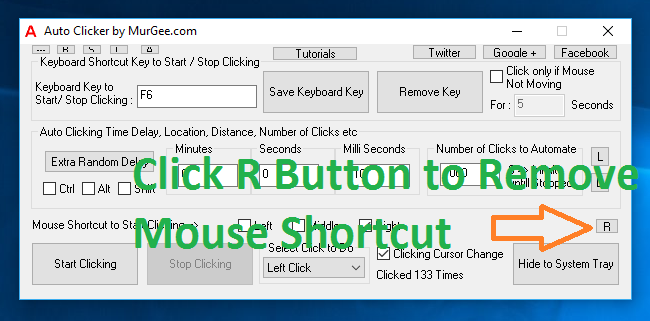
The Game Clicker automatically stops Clicking after the pre-configured number of Clicks have been automated, however when you want to stop the in progress Automated Mouse Clicking, you can do another Manual Right Click. Effectively the Right Click is here used as a Mouse Shortcut to Start / Stop Clicking. You can Abort / Stop Automated Mouse Clicking done by Game Clicker by simply closing the Game Clicker Application Window.
Although the Game Clicker offers less configurations as compared to the Auto Clicker, however it works in all kinds of Games, Full Screen Application, Multiplayer Games and everywhere else allowing you to Auto Click at current Mouse Cursor Location. As the Game Clicker is an inbuilt feature of Auto Clicker, you do not need to pay anything extra to use the Game Clicker is totally free for Registered Auto Clicker Users and even for Free Trial Users of this Automated Mouse Clicking Utility.